View an Individual Inventory Page
How to View Individual Inventory Lot Details
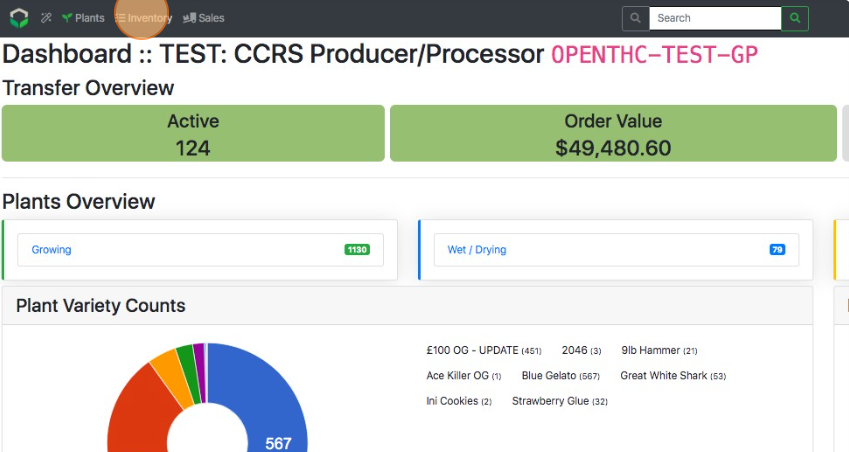
- From the Dashboard select Inventory.
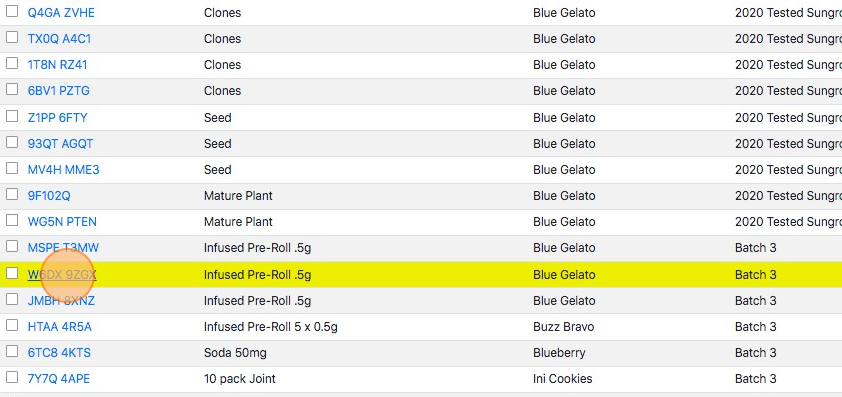
- Select a single Lot ID.
- In the upper-left of the page the individual Lot ID is displayed, along with a status icon.
- Below the Lot ID there is a table array with the following information:

- Variety. - The Variety Name and Variety Code (in brackets) for this Lot.
- Product. - The Product Name and Product Code (in brackets) for this Lot.
- Product Type. - The Product Type of the Product Name.
- Section. - The Section Name and Section Code (in brackets) for this Lot.
- Quantity. - The available quantity for this Lot.
- Initial. - The initial available quantity for this Lot.
- Shipped. - The quantity shipped out on B2B Sale transfers.
- Sell Price. - The sale price to be carried onto a B2B Sale transfer.
- Batch: The batch that this Lot is contained in.
- Cured. - The date this Lot was cured.
- Harvested. - The date this Lot was harvested.
- Created. - The date this Lot was created.
- License. - The License Name and License Code of the license that owns this Lot.
- Origin License: The origin license of this lot; only visible for inventory off of an incoming B2B Sale.
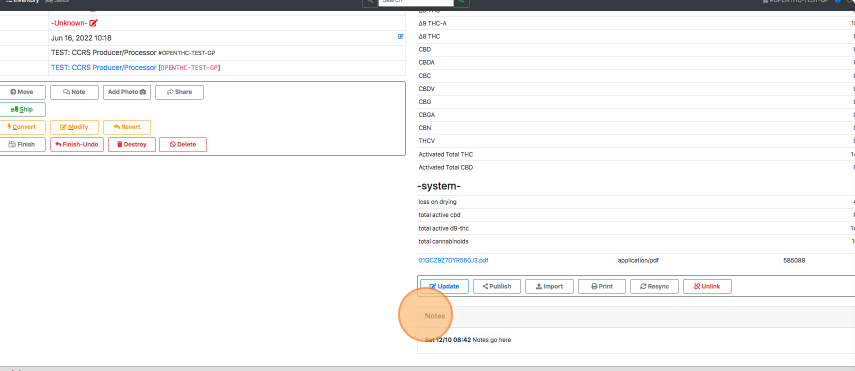
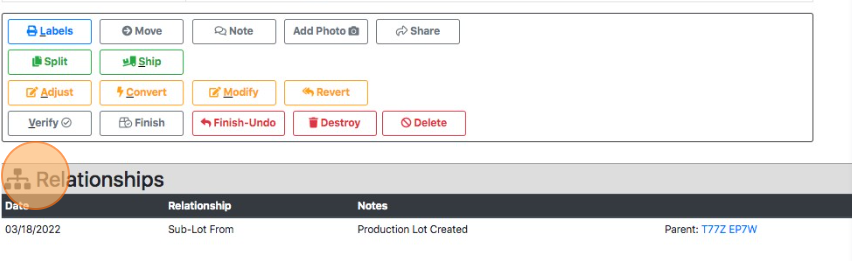
- In the middle are the following function buttons:
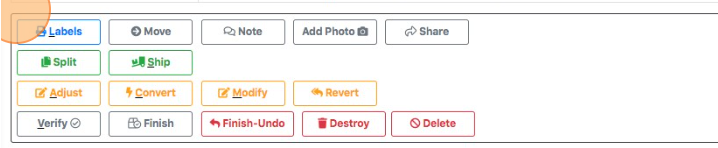
- Labels. - Print labels for this Lot.
- Move. - Move this Lot to a different Section.
- Note. - Add a Note to this Lot.
- Add Photo. - Add a photo to this Lot.
- Split. - Create new Sub-Lots from thsi Lot.
- Plant. - Plant some Propagation Material (Seeds, Clones, Plant Tissue, and Mature Plant only).
- Create Lot. - Create Flower Lots from Bulk Flower/Other Material only.
- Sell. - Add this Lot to a B2B Sale for transfer.
- Adjust. - Adjust the Weight/Volume of this Lot.
- Convert. - Convert this Lot into another Product.
- Modify. - Modify the a Variety / Product / Medical Status for this Lot.
- Revert. - Undo this conversion and move the Weight/Volume to it's original Parent Lot.
- Verify. - Verify all the data for this item.
- Finish. - Zero out a Lot that is giving you some trouble.
- Finish-Undo. - Undo the Finish process to this Lot.
- Destroy. - Schedule this Lot for destruction.
- In the upper-right there is a space for Laboratory Results to be linked in three ways:
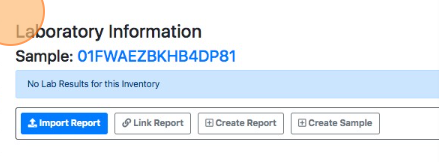
- Import Report. - Uploaded lab results using a JSON Link or File.
- Link Report: Link an existing lab report using a Lab Result ID.
- Create Report. - Manually entered lab results.
- Once lab results are created the following functions can be executed:
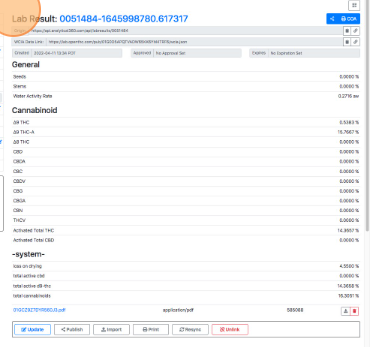
- Update: Modify existing Lab Results.
- Publish: Publish newly added results/COAs.
- Import: Import a new Lab JSON.
- Print: Print a Lab Summary for this Lot.
- Resync: Resynchronize Lab Results.
- Unlink: Remove a Lab Result.
- Below the Laboratory Results section is a space for notes to be displayed.
- Below the function buttons is the Relationship section where plant lineage is tracked.
- At the bottom of every Lot View page is a refresh button (spinning arrows) used to display History for that Lot.
